257 members
Other Compounds
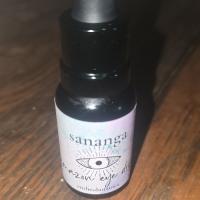
Sananga TRIBE WITH HappyKB, pachanoi - roy, and created with love by buddyJosh
Welcome to Sananga TRIBE Talk about Sananga related topics and more. Just enjoy yourselves and feel at home. One love everyone and I hope you all have a good day from buddyJosh. Thanks HappyKB as well as pachanoi - roy for being there for this group and for keeping it running.
What is Sananga?
HappyKB - Sananga is used to cleanse the body and mind of negative energy and toxins, promoting overall well-being and it is believed to sharpen visual perception, enhance focus, and even grant infra-red night vision. Sananga is used to treat various mental health issues, such as psychospiritual illnesses, by clearing the mind of distractive energies. It is said to strengthen the immune system, may help alleviate inflammation, and it is believed to release endorphins which can help provide relief from physical and emotional pain. Sananga is thought to remove energetic blockages, promoting a sense of relaxation and inner peace, it is used to cleanse and open the 3rd eye, and it is used to enhance spiritual awareness allowing an individual to access their Higher Self. ****Side note, it is not for the faint of heart, but very beneficial when used correctly***
Apply your medicine/supplement
HappyKB - I worked for an eye doctor for over 15 years. the proper way to administer eye drops are one at a time at the base of the eye and you roll the eye down that way it distributes all the way on the eye into all the areas of the eye.
Bulk DIY method for sananga eyedroppers with buddyJosh
Pt. 1
You will need:
-25g sananga rootbark (ground)
-150ml of water per 25g bark (distilled)
-cooking pot
-funnel
-coffee filters
-eyedropper bottles
-water bottle? (sanitized)
Start by boiling the water and then bring it down to a medium-low. Stir in the bark. Let it simmer until you'll be left with 1/3 of the water. Put your sananga into a bottle placing it in the fridge face-up for 24 hours. You will then use your funnel and decant the liquid into eyedropper bottles. If you have trouble filtering the bark from the liquid then you can just use coffee filters.
Pt. 2
boil 2-3L of distilled water for 2-3 hours, or more. I'll bring the water to a boil. Then I'll turn down to a simmer. I'll boil it on a medium low heat until I reach the desired amount in ml of sananga eyedrops. I'll leave the mixture in the fridge overnight. Then, I'll separate the bark powder from the liquid using a filter in the morning. Extracting for longer will make more potent medicine. I'll take my time in order to get what I asked for. I know that 5g can get you 20-40ml. I know that with another recipe 25g can make up for 50ml as the end result. Maybe with this recipe you can double the amount from 50ml to 100ml. It does seem to me that 25g is a lot to use in only 50ml sananga while comparing it with this other recipe, and another. Although when I had checked with a buddy from Peru he had told me that the sananga is also made in this way. I have displayed for you all 3 ways to make your own sananga eye droppers. If you scroll down on this page you will find some ideas.
Pt. 3
Sananga DIY tool set - Instructions
This tool set includes: Precision pipette, Plastic PE funnel (50 mm), Filter papers, 2 bottles 50 ml white HDPE, 2 bottles 50 ml clear PET, 5 dropper bottles 5 ml LDPE, 5 small gripseal bags and 5 large gripseal bags.
Using this kit with one of the available varieties of Sananga rootbark you can make upto 100 ml Sananga drops. And of course the kit can be reused many times. To extract the rootbark, all you need is clean (boiling) water. Preferably mineral water that is free of chlorine and fluoride. Use a stable, clean table and working environment and with clean hands and tools.
The following instructions show how to extract Sananga rootbark in two or three extractions. For the first part of the process, you will need the white heatproof HDPE bottle, and 2 to 5 grams of cut and seived Sananga rootbark. The trickiest part of making the drops is filtering the liquid. To make it as easy as possible, we cut and seive our Sananga rootbark into a fine consistent grain, free of fine powder. This makes the final filtering process much easier and produces a clean, clear liquid.
STEP 1. Preparation. Open the white 50 ml HDPE bottle and insert 2 to 5 grams of Sananga root bark (depending on the variety).
Using a notebook, make a note of the SKU and batch and weight used. (Do not stick a label on the bottle itself, because the bottle will be sterilized in boiling water during a later stage).
STEP 2. The first extraction. This stage involves pouring boiling water into the 50ml white HDPE bottle. Begin by placing the bottle inside a teacup (to prevent the bottle from toppling over, or the hot water scalding your hands). Bring some water to the boil in a small pan (Boiling the water will eliminate any bacteria or other microbes present in the raw rootbark). Pour the water into the bottle while the water is still bubbling. Slowly and carefully fill the bottle until it s almost full.
Firmly close the bottle. Before closing the lid, squeeze most of the air out of the bottle (take care, since the bottle will be very hot).
Now the bottle should look like it has a dent. (The reason for the dent is because when you shake the bottle when hot, the volume will expand.
Shake the bottle gently for a minute and set it aside (still taking care not to scald yourself). Give the bottle a few shakes every 10 minutes for the next hour. Then swirl the bottle around a little so all the plant matter is submerged and not stuck to the side of the bottle. Put the bottle in the fridge for 24 hours, storing it in a gripseal bag, with the lid facing upwards.
STEP 3. Decanting. The following step separates the liquid from the infusion, into the clear PET bottle.
After 24 hours of infusion, the plant residue will have settled to the bottom of the bottle. Remove the bottle from the fridge and take it out of the gripseal bag. Do this carefully, so as not to disturb the plant residue, which should remain settled on the bottom. Take the clear PET 50 ml bottle and slowly decant the liquid into it. You can use the funnel if you like, but it s not essential.
When decanting, try not to pour any plant matter into the bottle. But don t worry too much if a few small particles cross over. They will be filtered out later in the process.
Leave the wet plant residue in the white HDPE bottle. Patiently allow the liquid to drip from the residue. If the bottle is handled carefully, all residue should remain at the bottom.
You should now have approximately 25 ml of extremely strong (unfiltered) Sananga collected in the clear PET bottle. You can test it at this stage by extracting some liquid from the bottle with the pipette. Most likely this Sananga will be as strong as it gets. The next stage is to extract more Sananga from the rootbark.
Place the PET bottle with your first Sananga extraction in the fridge, storing it in a gripseal bag, with the lid facing upwards. Don t shake it, and allow the liquid to settle to ease the filtering process. You can now proceed to step 4 (the second extraction) or 5 (filtration).
STEP 4. The second extraction. To extract the remaining Sananga from the plant, repeat steps 2 and 3, but use only half the amount of boiling water (by filling the bottle half-full)
After another 24-hour infusion, decant the second extraction into the same PET bottle, leaving the plant residue in the white bottle.
You should now have approximately 40-50 ml of very strong (unfiltered) Sananga. If there is too much to fit in one bottle, pour the excess into the second clear PET bottle. Shake the PET bottle gently and place it in the fridge in a gripseal bag with the lid facing upwards.
Once again, allow the resulting liquid to settle for 24 hours before proceeding to Step 5: filtration
You can test the Sananga again at this point. Assuming it is now milder than the initial, strong concentration, then it s probably at the right strength. At this stage, you won t be able to get much more from the rootbark though if it is still very strong, you can do another extraction. Repeat steps 2 and 3 (using even less water) and decant the extraction into the same PET bottle(s). Put these bottles in the fridge, inside a gripseal bag with the lid facing upwards. As before, the liquid is ready for the final decantation when the plant matter is completely settled which takes 24 hours. The remaining Sananga residue can be discarded, perhaps by using it as compost for your houseplants. Wash the white bottle thoroughly so it can be used again.
STEP 5. Filtering. The final stage is to filter your fresh Sananga drops. You will need the heatproof HDPE bottle again for the sterilisation process .
Slowly and carefully, take the Sananga bottle from the fridge. If for any reason the mixture appears shaken up or only partially settled, put it back in the fridge for another 24 hours.
Assuming the liquid is clear, take a paper filter, put it into the funnel, and put the funnel into one of the white 50 ml HDPE bottles. Place this empty bottle in a teacup to keep it steady. Open the bottle containing the liquid making sure not to shake it, so any remaining plant matter or fine particles stay settled on the bottom.
Then, fill the funnel once and watch how quickly it starts to drip, topping up as required.
If the funnel drips slowly, leave it for as long as necessary whether this is a matter of minutes or a whole hour.. When the dripping has slowed right down, or all the liquid appears to have drained, replace the filter paper and repeat. This filtration stage can take some time and and requires patience.
When you place a new filter in the funnel, be sure to fold the used filter very tightly and exerting gentle pressure slowly squeeze the remaining liquid into the new filter so as not to waste any of the Sananga.
This technique works whenever there is still some liquid left in the filter. (Make sure to have clean hands when handling the filter).
Repeat the process until all the liquid has been filtered.
STEP 6. Sterilisation. This step involves bringing the liquid to the boil for long enough to eliminate any bacteria and to maximise shelf life. Take the white HDPE bottle containing your Sananga liquid. (Do NOT use the clear PET bottle because it will not survive the heat). Open the lid of the HDPE bottle and squeeze most of the air out of it, then seal the lid tightly. Now the bottle should look like it has a dent. Bring a pan of water to the boil, then put the bottle in, so it floats on the bubbling water.. Put the lid back on the pan and keep it on for a full 10 minutes, before using a spoon to remove the bottle from the pan. Allow it to cool. Your Sananga is now sterilised and preserved. Do NOT open the bottle yet. As long as it is not opened, it will remain sterile for a very long time, even without being refrigerated. To be on the safe side, store it in the fridge inside a gripseal bag for future use. Keep your notes with the bottle, or stick a label on it.
STEP 7. Filling dropper bottles. The DIY kit includes LDPE eye dropper bottles with a capacity of approximately 5 ml. Take your Sananga from the fridge and open the bottle. Use the pipette (included in the kit) to extract some liquid from the bottle, and fill your dropper bottle. Immediately seal your bottles and place them in the fridge in a gripseal bag. These 5 ml dropper bottles of Sananga are now ready to use. They will have a decent shelf life and you can keep them on you for weeks with without the need for further refrigeration.
To see if there is any more Sananga to be gained from the leftover material, you can do a final extraction and test the result. If the plant matter is a much lighter colour compared to the first extraction, then it probably doesn t contain much more active ingredient. Usually, you will get 2 solid extractions. If you do 3 extractions, the batch will probably be less potent. It all depends on the particular batch of Sananga rootbark.
Ps. Sananga may be stored in the freezer to hold the potency for longer. Preferably use a deep freezer for longer time in storage without loss of potency.
